Reservation Overview
The menu item Reservation Overview takes you to the heart of the pension management software. Here the reservation book with all reservations or bookings is displayed.
Overview
All existing reservations are listed in the overview.
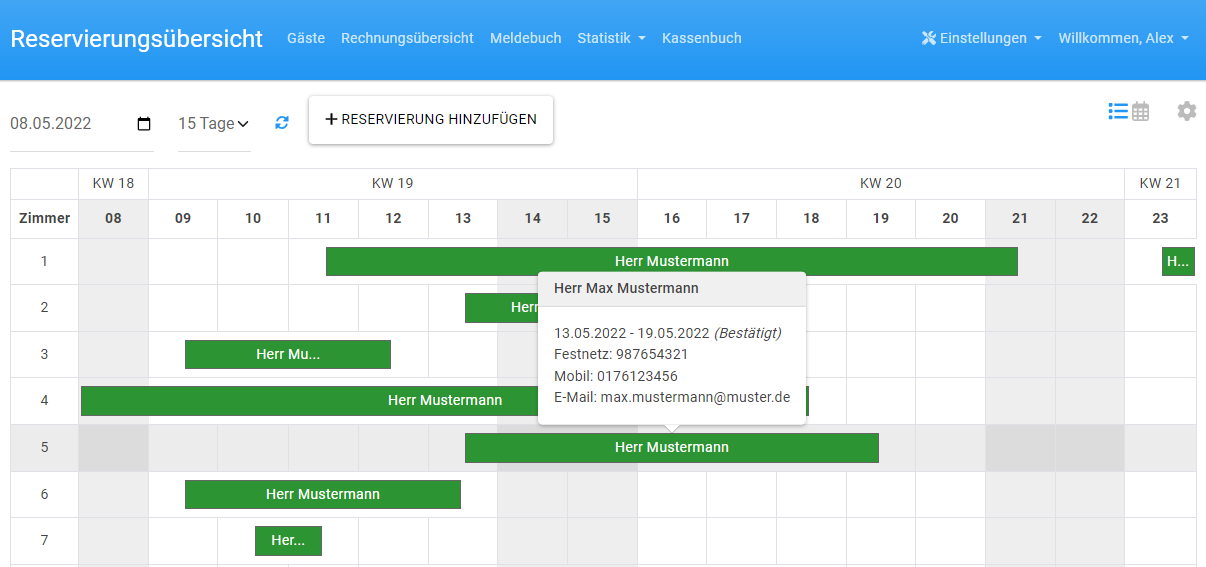
On the left side of the table you can see the rooms. The top row of the table shows the weekdays. Weekends are highlighted in grey here.
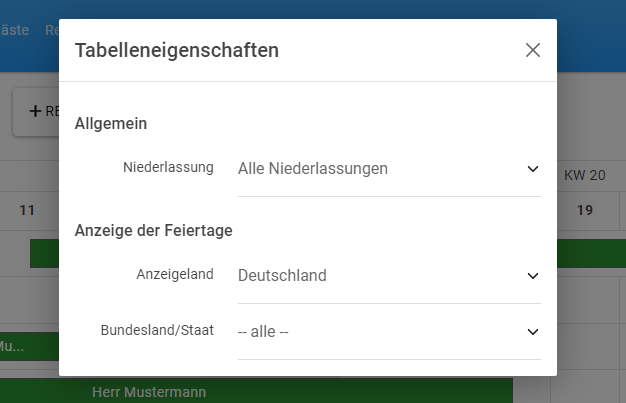
You can filter according to location and time period. In addition, there is the possibility to display holidays for many countries.
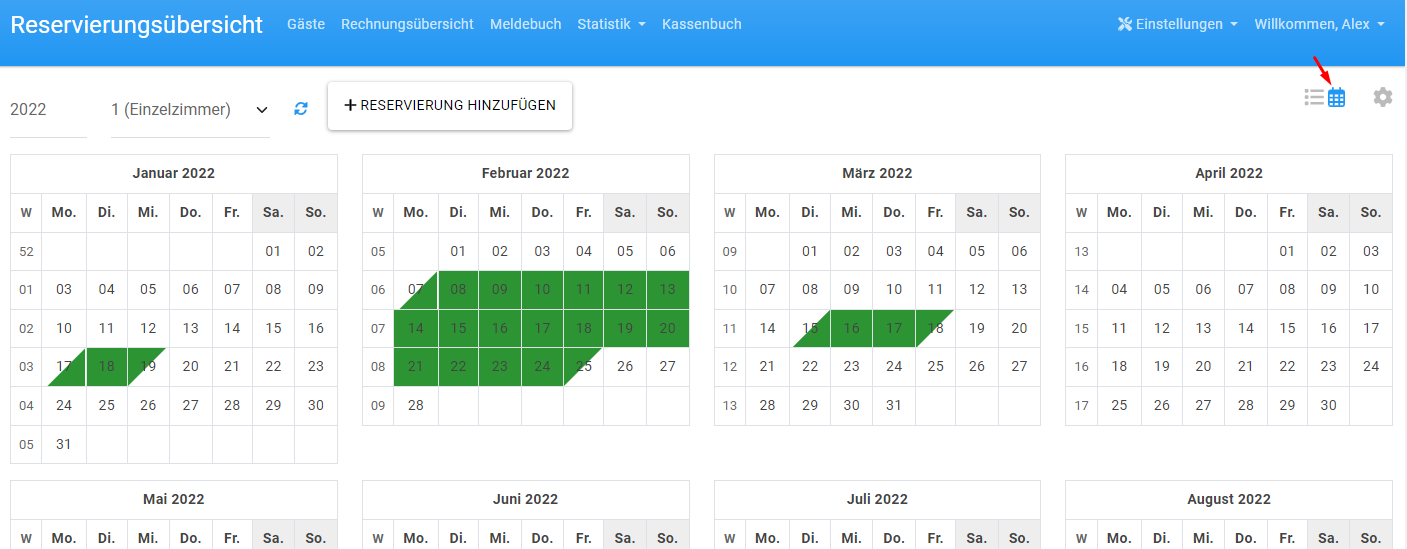
Furthermore, the calendar icon in the upper right corner can be used to switch to the yearly view.
Add
Reservations can be added in two ways.
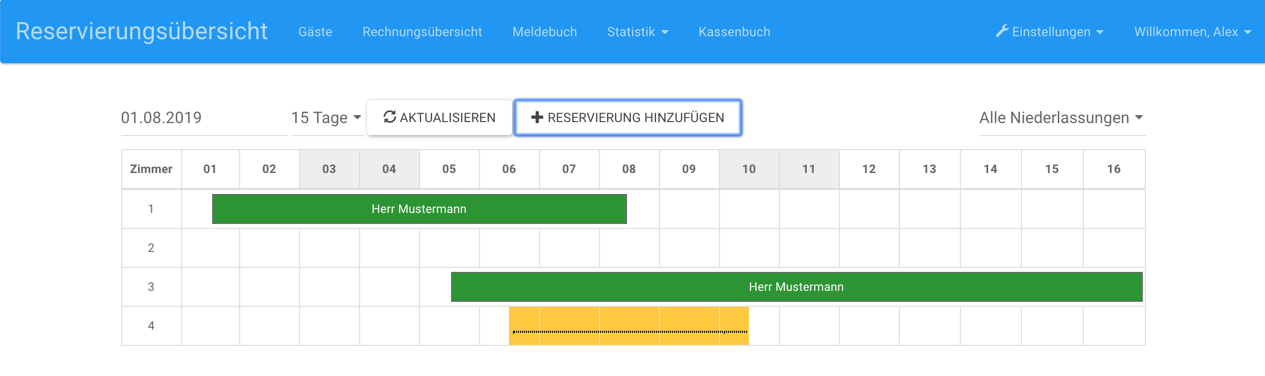
- Using the Add Reservation button
- or even faster, by marking the time period in the table (yellow highlighted area in the picture below.) For this, keep the left mouse button pressed from the first field, drag it to the target day and release the button.
Then the process of adding starts:
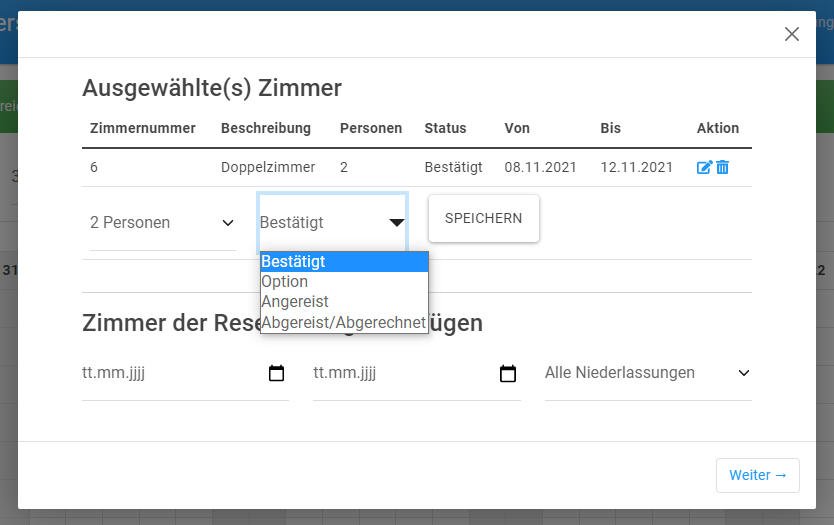
In the first step you have the possibility to add another room to the reservation or set the status of the reservation (see
Reservation Status
by clicking on
 ) and define the number of persons in the room.
The selection of the number is based on the settings of the room .
With a click on Next you get to the next step, to add the guest:
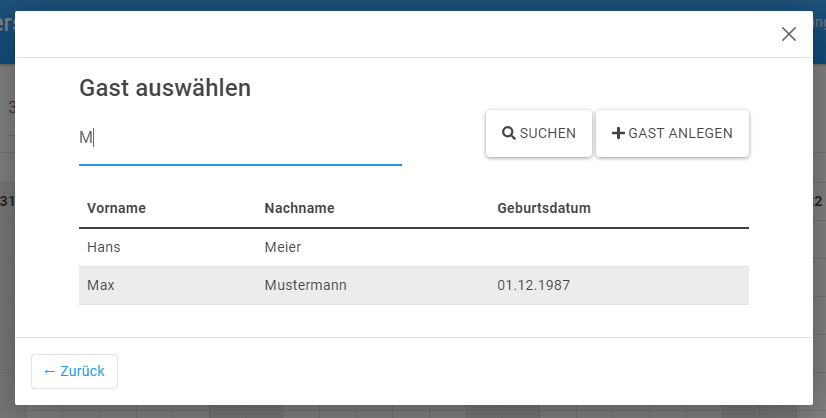
Here you can search for existing guests or create a new guest.
If a guest has been selected or created, the reservation overview is displayed.
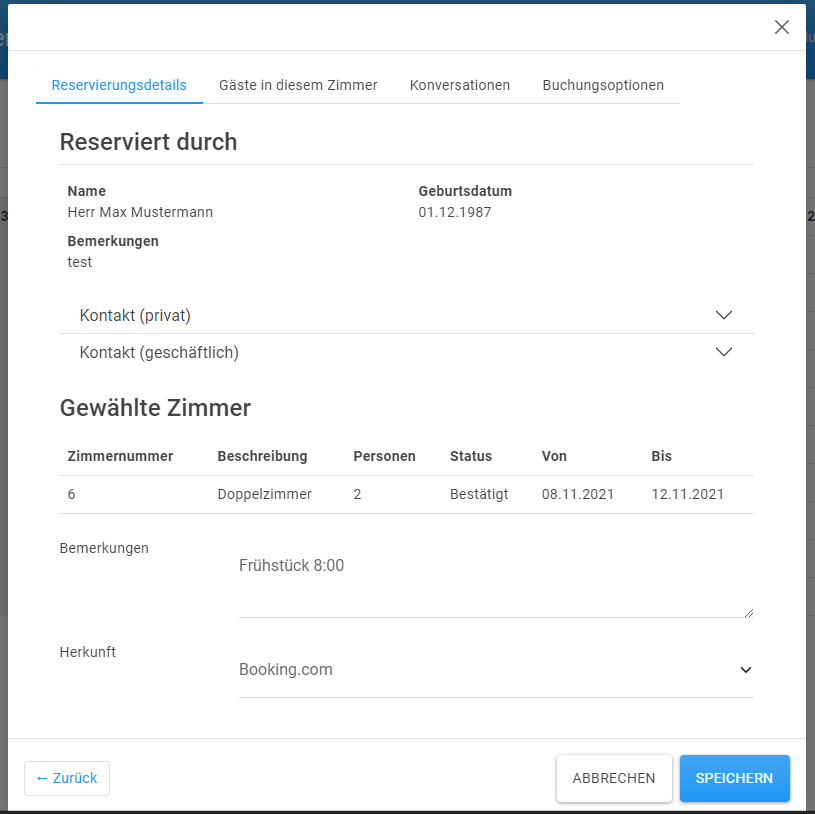
Using the menu item Guests in this room you can add more guests. If the person who made the reservation is not the guest, this can also be adjusted via this menu item.
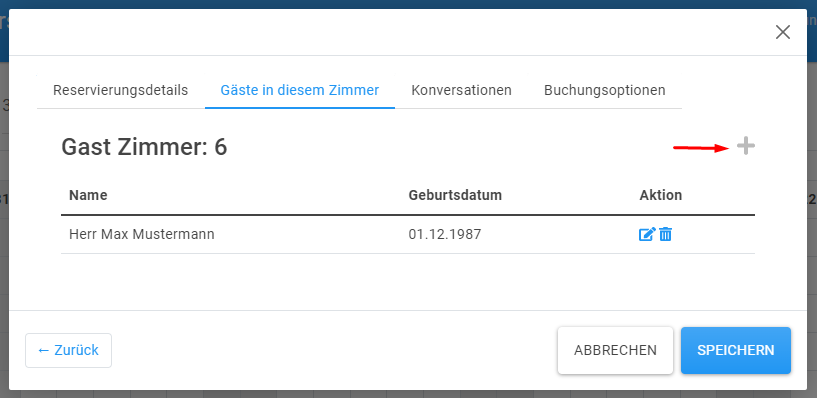 the master data of the guest will be edited. If you want to select another guest, you must delete the existing guest from the list and choose the new guest with the + symbol.
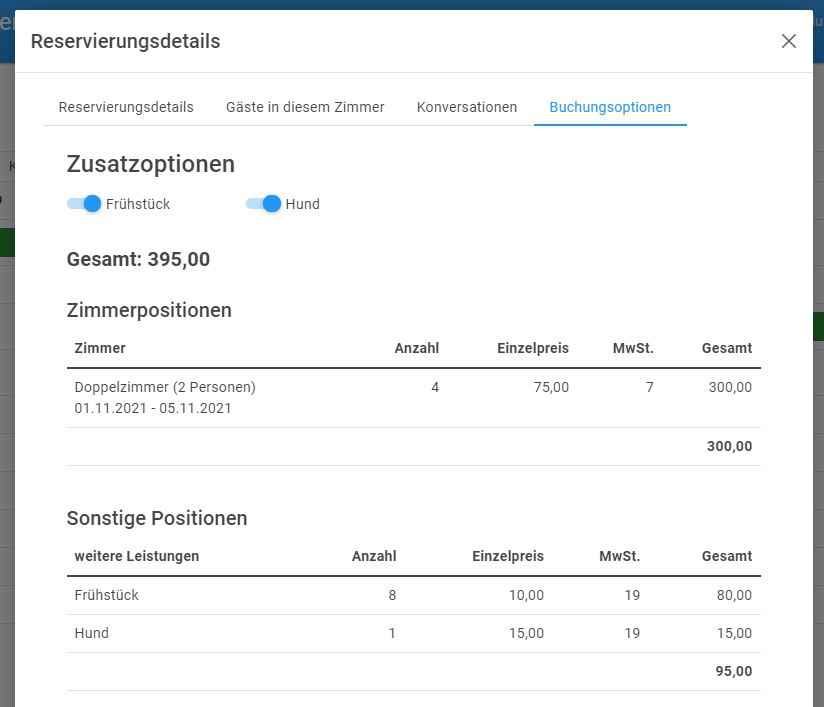
In the tab
Booking options
you can select which other items (eg breakfast) should be assigned to the reservation. This selection is also taken into account when creating the invoice.
Furthermore, the single and the total price are already displayed directly in this view.
(Based on the set
price categories
.)
Click on Save to finish.

Details
If you click on a reservation in the overview, you will get a detailed view.
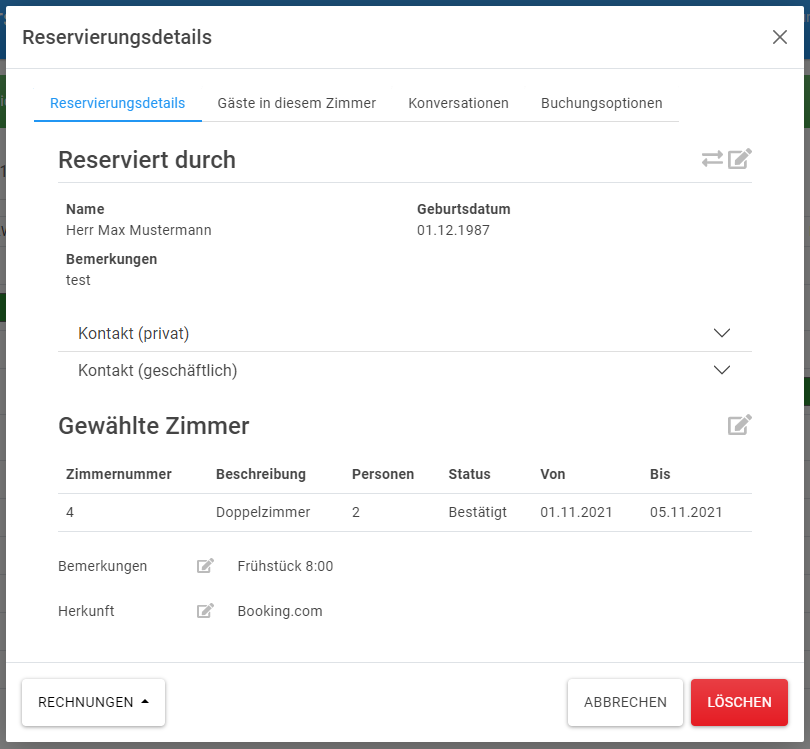
Using the Invoices field at the bottom left, an invoice can be created directly for this reservation or existing invoices can be exported as PDF.
Conversations
In this tab, e-mails and documents can be sent to the guest based on templates .
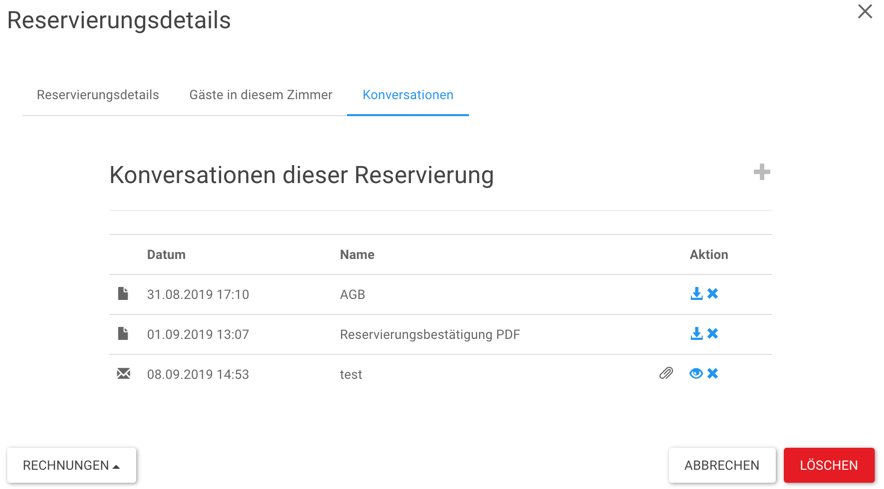
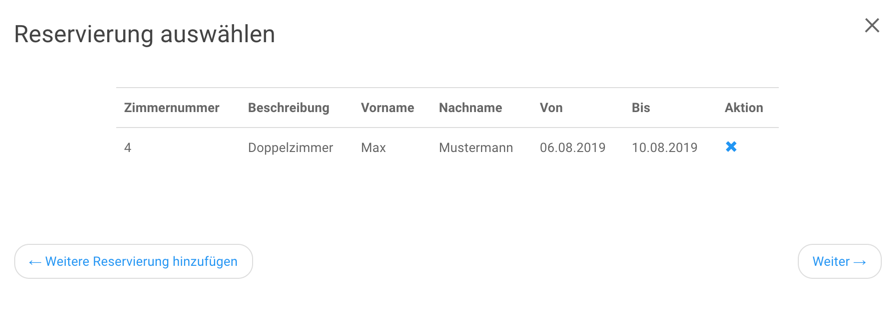
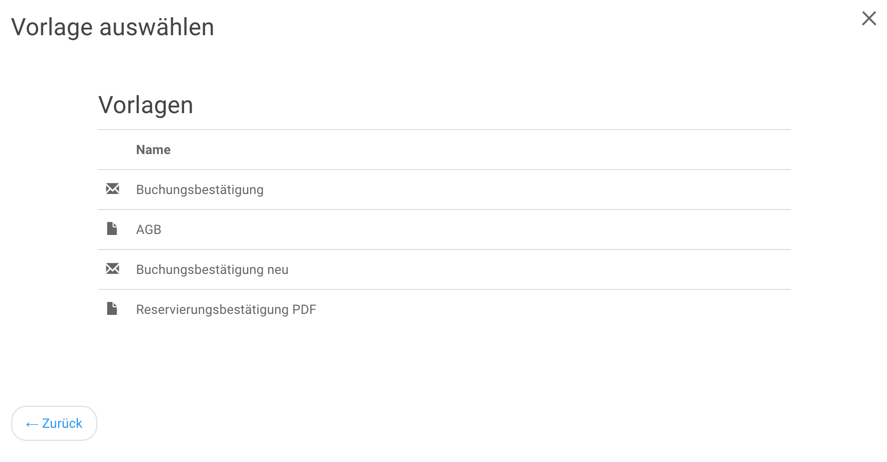
Click on + to add a new conversation. In the first step you can add more reservations.
By clicking on Next, all available templates are displayed:
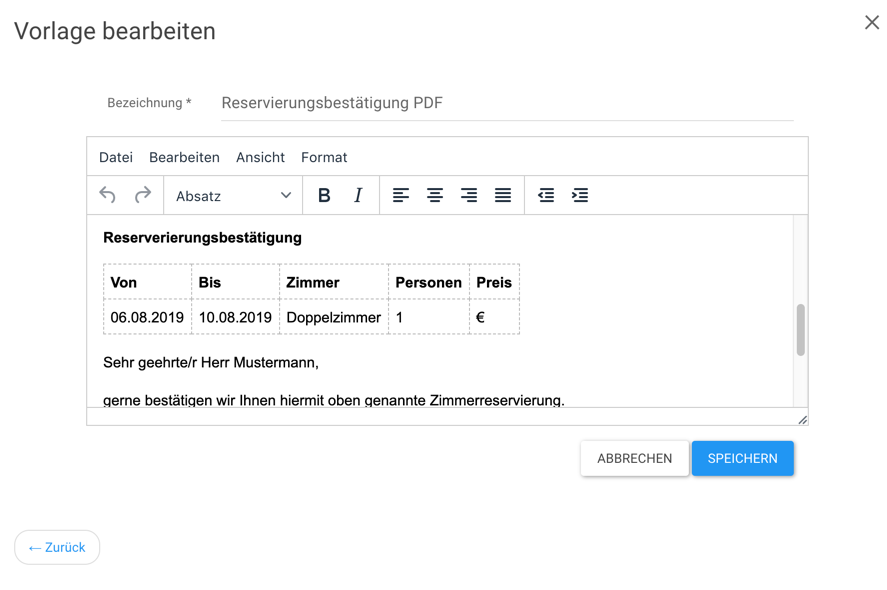
The example "Reservation confirmation PDF" shows that the placeholders are now filled with the contents of the selected reservation(s):
If you select the template (e-mail) "Reservation Confirmation" in the template selection, you can adjust the text of the e-mail and attachments:
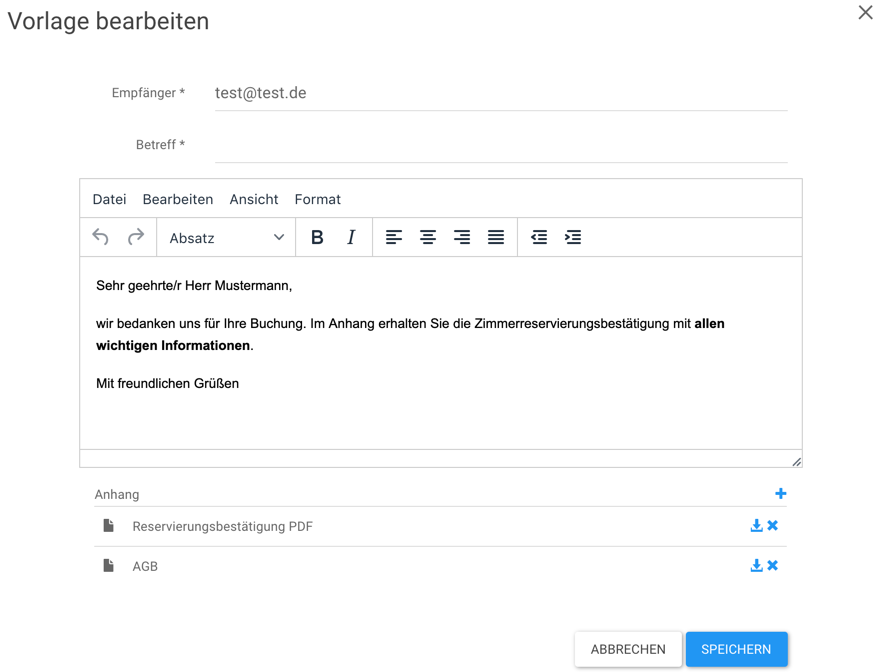
By clicking on + you can select which file should be added as an attachment. You can select documents already added to the reservation or new ones (from template).
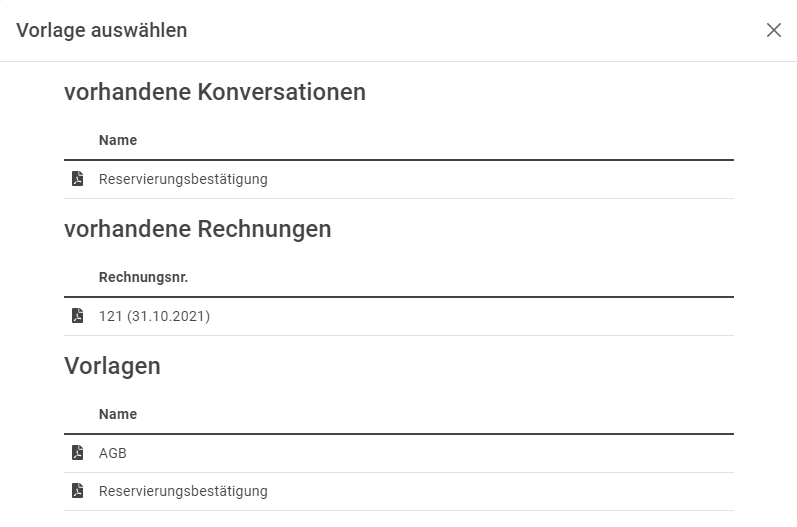
By clicking on the icon
 you can view the saved documents again before sending them.
To send e-mails from the application, an external mail provider must be used. This can be your own mail server, for example, which is used for sending business mails. The mail server must be configured in the application. See also Configuration or Configuration with Docker .
Edit
All values can be edited in the detail view. To do this, click on the symbol
.
Delete
If you click on the symbol
 under Actions in the overview, the selected element can be deleted.