Templates
Templates can be created in the pension management software and reused in different areas of the application to customize exports to PDF or e-mail. Defined placeholders are used, which are replaced with the real data in the respective place during generation.
Usage
Templates can be used within the application for the following purposes:
- Create invoice (PDF)
-
conversations for a reservation
- Send e-mail to the guest
- general PDF as e-mail attachment (e.g. AGB)
- reservation related PDF file (e.g. reservation confirmation)
- GDPR Export for one guest (PDF)
- Cash book export (PDF)
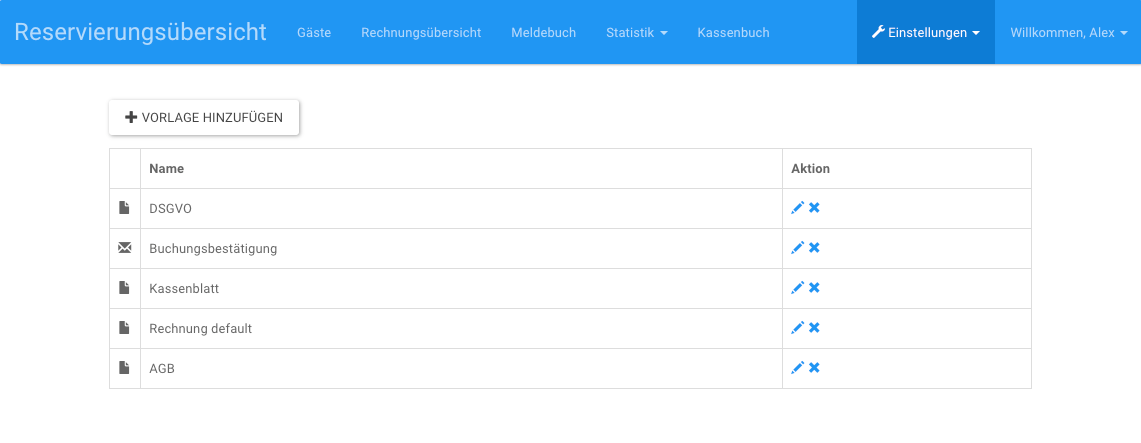
Templates overview
The templates can be managed under Settings -> Templates. Here is an exemplary overview:
Example templates
If you use the application for the first time, you can copy the provided examples and adapt them for your needs.
Approach
- Please copy the content of the examples from the respective example file from here .
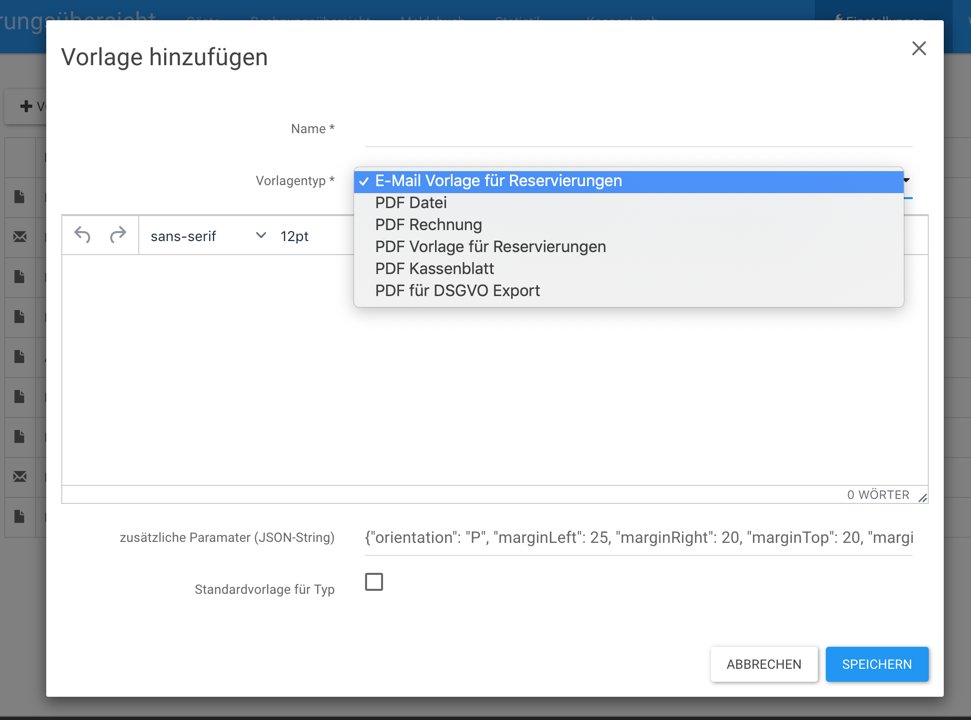
- Switch to the template overview of the application and click "Add template".
-
Select template type and switch to the source code view as shown in the picture.

- In this view replace the complete content with the content copied from step 1 and click "Save".
The following examples exist:
| sample file | Template type |
|---|---|
| dsgvo-export.txt | PDF for GDPR Export |
| email-buchungsbestätigung.txt | E-mail template for reservations |
| kassenblatt.txt | PDF Cash sheet |
| pdf-reservierungsbestätigung.txt | PDF template for reservations |
| rechnung-default.txt | PDF Invoice |
Add Template
The template type can be selected under "Add template" when creating a template, as shown in the following picture:
Templates can be visually adapted to your own needs with the help of the editor.
The field additional parameters (JSON string) contains parameters which have influence on the exported PDF document.
-
orientation
- 'P': Portrait
- 'L': Landscape
- the others, according to their names, have an effect on the page margins (data in pixels)
In addition, different blocks can be inserted into the template depending on the template type. These placeholders are then filled with the respective data during the actual export. Thus, a generally valid template for e.g. invoices can be created in this overview. The placeholders are then replaced with the real values when a selected invoice is created.
Add block/placeholder
By clicking on the
 icon in the editor, all available placeholders are displayed. The list varies depending on the template type selected.
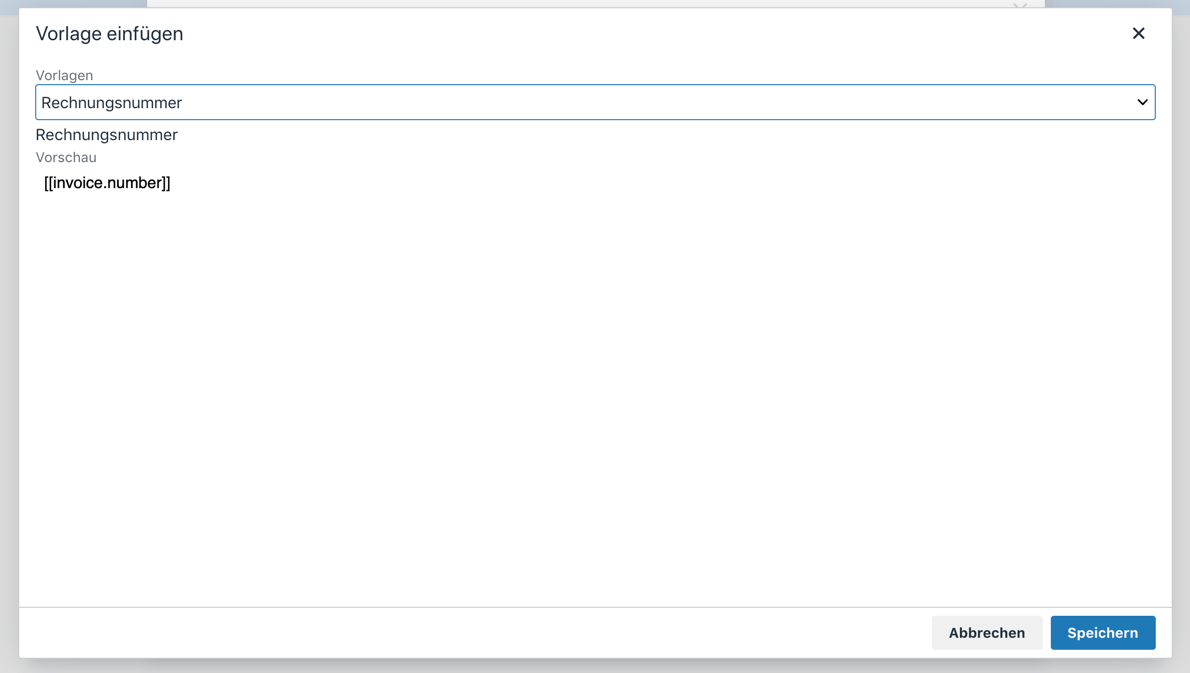
Then select the placeholder you want to insert from the list and click on "Save".
The placeholder is inserted at the position where the cursor is located.
Here is an example for the template type PDF invoice:

Insert images
If you want to have images, such as your company logo, in the document, the management software allows you to upload images by clicking on the image icon, as shown in the picture below:
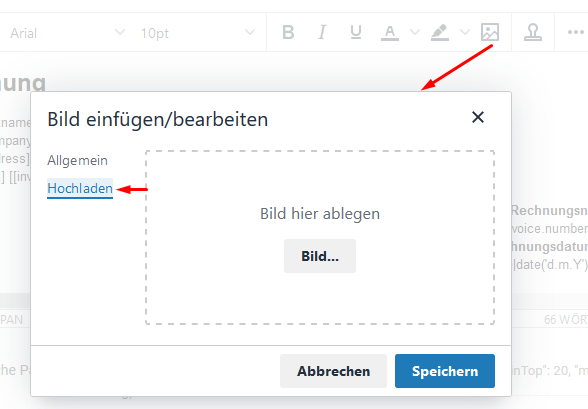
Images are then uploaded and inserted where the cursor was last positioned.
Edit
When you click on the symbol
 in the overview under Actions you get the form for editing. Here you can edit all fields the same way as when you add an item.
Delete
If you click on the symbol
 under Actions in the overview, the selected element can be deleted.